Introduction
- Microservice is a small software service that performs a single specific task. We can develop such microservices and integrate them into a fully functional product/service by using Microsoft’s cloud platform Azure.
- Azure provides numerous microservices solution patterns on its platform.
- Solution pattern using Azure app service, traffic manager, and application gateway allow the creation of small, autonomous services, where each function is self-contained and implements a single business capability.
What are Azure App service, Traffic Manager, and Application Gateway?
- Azure App Service The Azure App Service allows you to develop and host web apps, RESTful APIs, and mobile back ends in the programming language of your preference without affecting infrastructure and it also offers high availability and auto-scaling, supports both Windows and Linux, and facilitates automated deployments from GitHub, Azure DevOps, or any Git repo.
- AzureTraffic manager Azure Traffic Manager is a DNS-based traffic load balancer that permits you to distribute traffic optimally to services over global Azure regions while providing high availability and responsiveness.
- Azure Application Gateway Azure Application Gateway is a web traffic load balancer that enables you to control traffic to your microservices. Application Gateway can make routing adjustments based on additional attributes of an HTTP request, for example, URI path or host headers.
One-click infrastructure deployment using Azure DevOps pipeline
- Azure DevOps is a service to deploy CI/CD pipelines.
Let us see how we can create a pipeline to deploy a Terraform configuration using an Azure DevOps pipeline. - We will be able to build a PaaS Azure Resource called App Service This Azure resource enables us to deploy microservices for this sample, a node js app.
- Requirements
- Azure DevOps is a service to deploy CI/CD pipelines.
Steps to follow
1. Create an Azure DevOps Project:
- To build an Azure Pipeline, you must plan your Azure DevOps project that will include the automated pipelines that deploy the infrastructure to the cloud.
Follow the below-mentioned steps:
- Create New Organization
- Open https://dev.azure.com
- Create a Project
- After creating the project – name it. Authorize your Azure Cloud subscription
- Add a service connection for your Azure Subscription
2. Create Automated Pipeline:
- After creating your organization and project within Azure DevOps, you can advance to build your automated Pipeline.
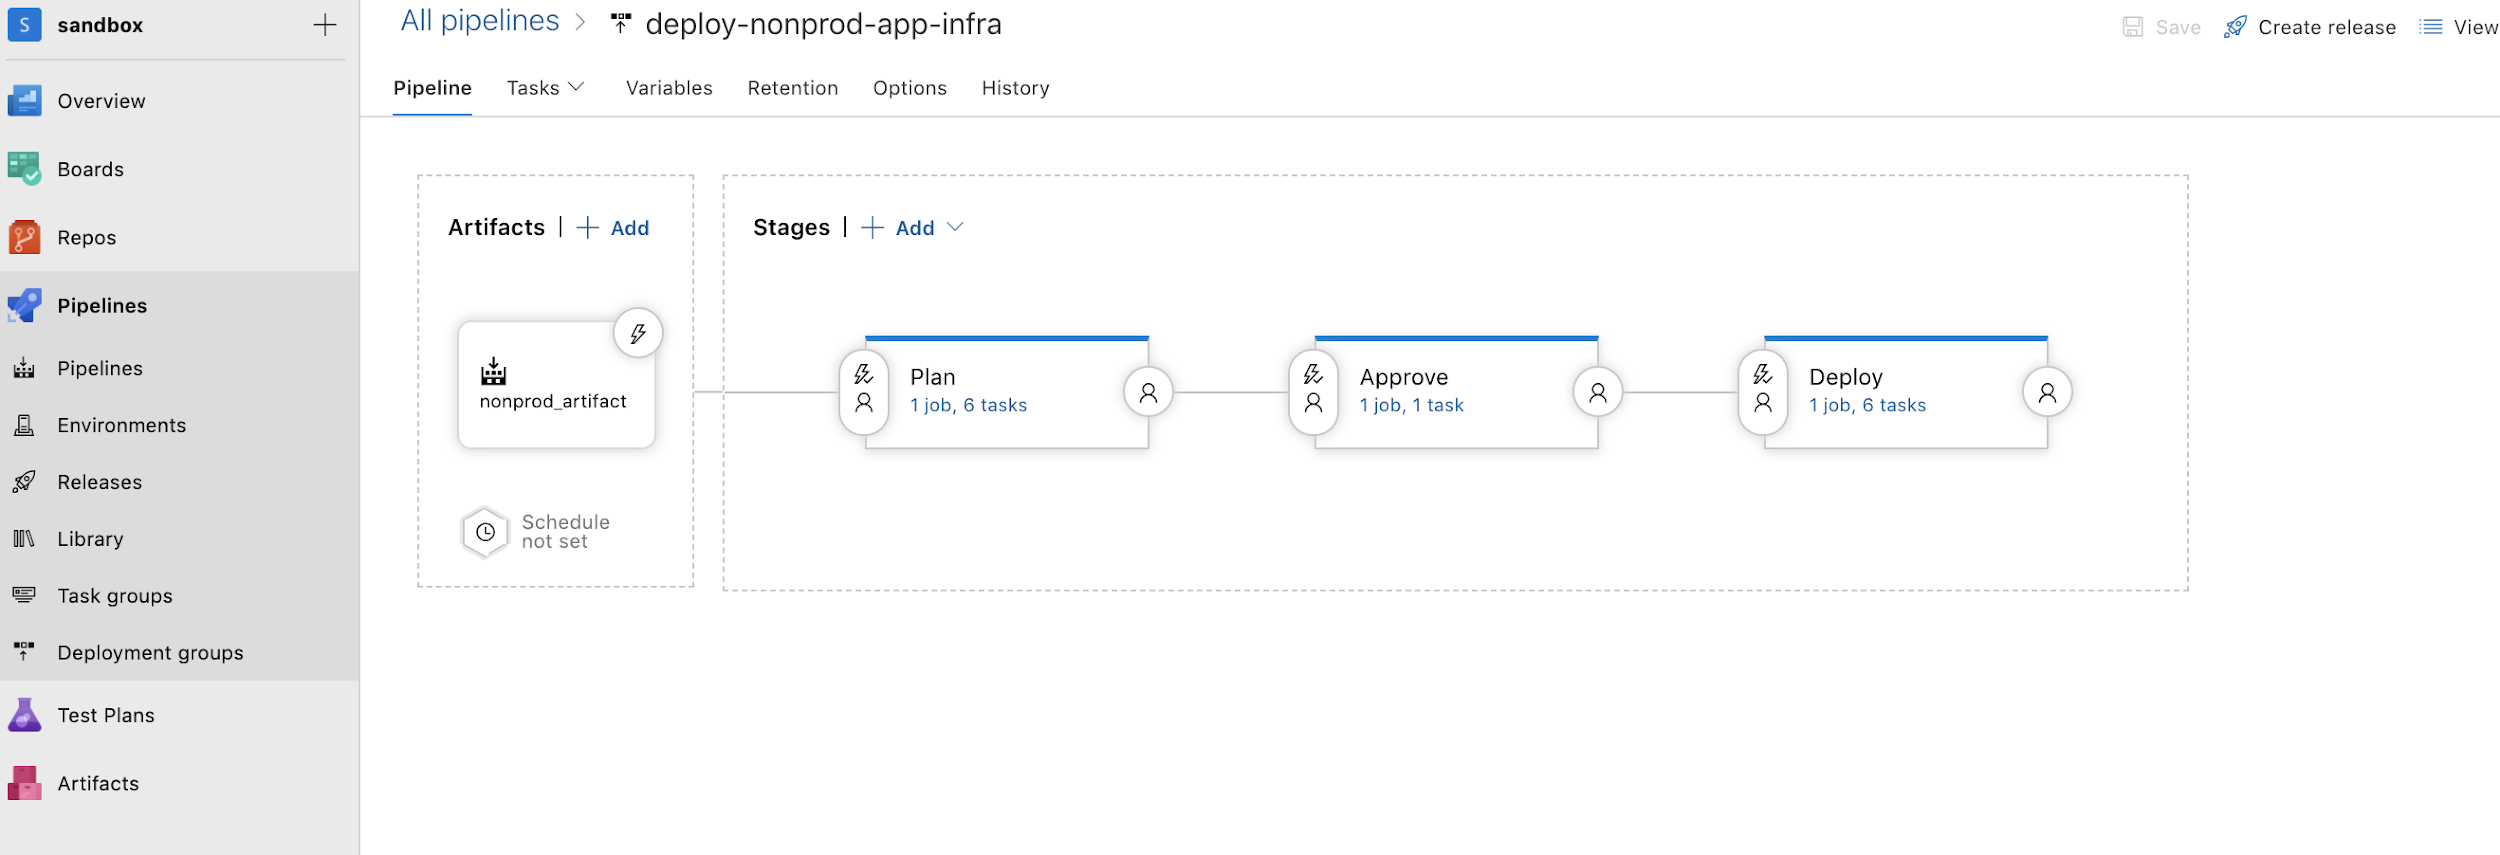
- Create a Release Pipeline
- This Pipeline will allow us to set various required steps that execute our different jobs to deploy the infrastructure to the cloud.
- Create a new Release Pipeline
- Add an artifact where your terraform code is being hosted. You should append a new connection to your Github in service management
- Add a stage, e.g., Prod or Dev. This step should be an empty job.
- After creating your organization and project within Azure DevOps, you can advance to build your automated Pipeline.

- Select an Ubuntu OS Agent
- One should use an agent that runs with Ubuntu OS as the scripts are coded in bash.
- Create Pipeline variables
- These pipeline variables will be utilized in order to parameterized names for some resources and evade the hardcoding within the scripts
- These variables will be used to generate the Azure resources that will store the Terraform backend.
- The variable “TerraformStorageAccount” attributes to the name that you will set to the storage account in Azure that will store the Terraform backend, and this variable should be distinctive for any implementation since this should be a different name within Azure Cloud
- Select an Ubuntu OS Agent
3. Terraform Backend
- Terraform stores state locally in a file labeled terraform.state. When working with Terraform in a team, the use of a local file Isn’t a great idea.
- One can use the distant state that allows Terraform to address the state data in a sparse data store that you specify yourself.
- We will use a Terraform CLI task that enables us to build an Azure storage account and storage container to save Terraform state if this does not exist yet.
- Terraform CycleWhen operating Terraform in automation, the focus is usually on the core plan/apply cycle. The principal Terraform workflow is the following:
- Initialize the Terraform working directory
- Come up with a plan for changing resources to match the current configuration
- Apply the changes described by the plan
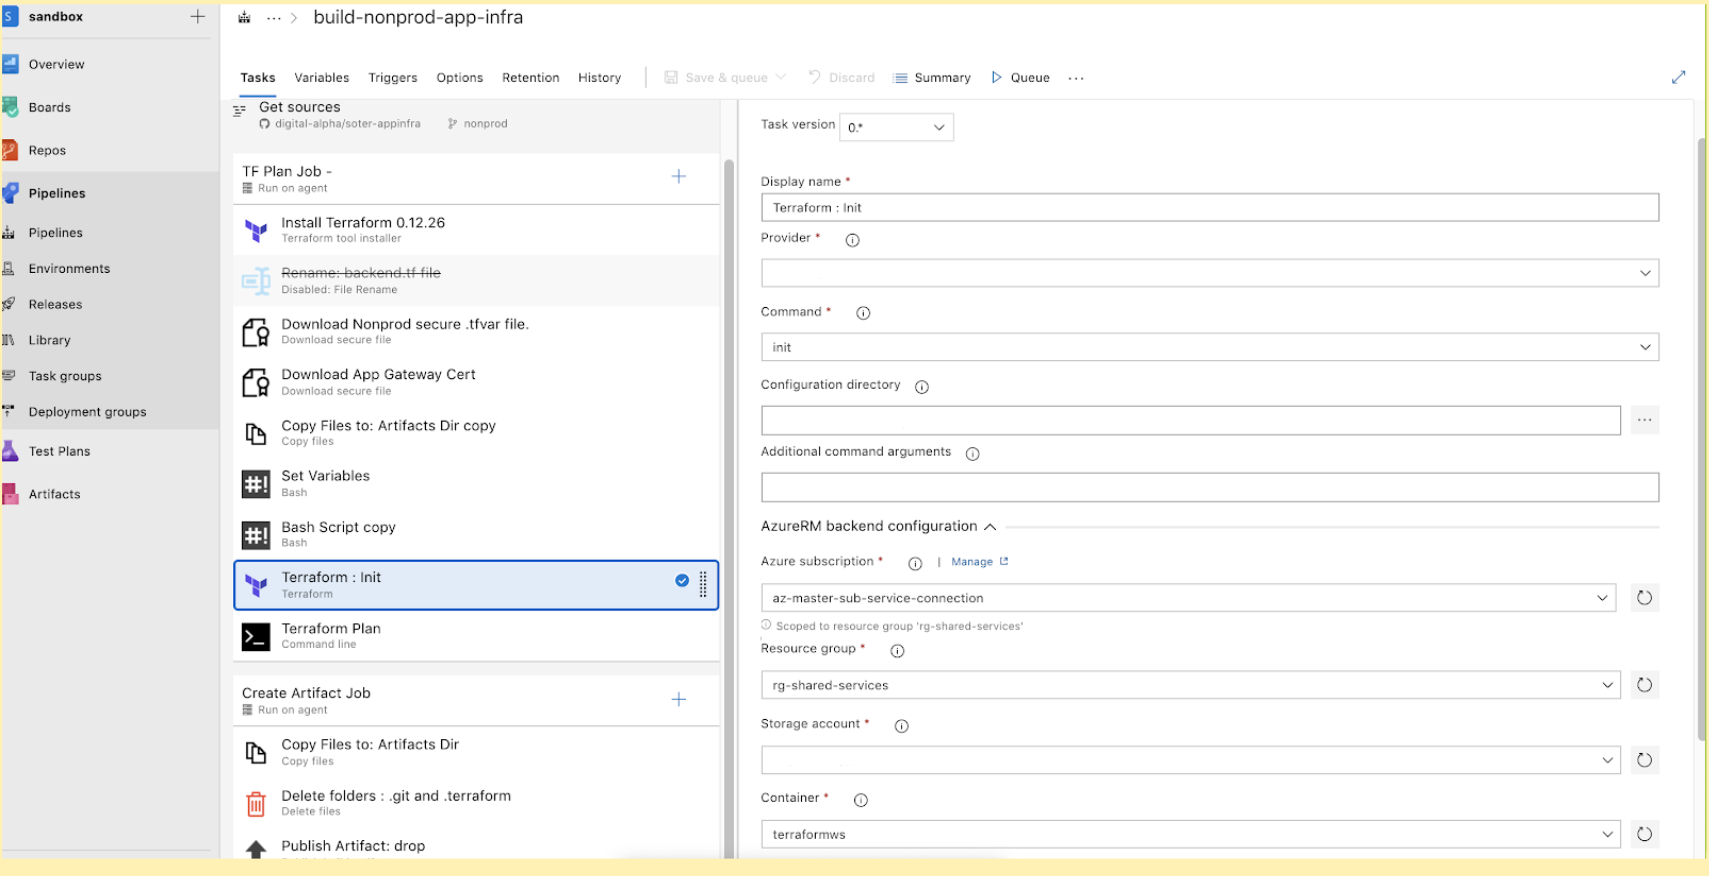
4. Add Task – Terraform Init
- You should install the extension in order to manage the terraform task.
- Once the extension is installed in your Azure DevOps, you can combine the job for Terraform Install; this job will ensure that the agent that runs the command has Terraform installed.
- Add Terraform CLI task to complete the Init Stage, you should choose the command “Init,” and for the Configuration directory, you should lead to the artifact configured earlier.
- Configure the Azure Resource Manager section in order to ascertain the Terraform Backend that will be located in Azure; we should adopt the Pipeline variables configured beforehand.
- This task runs a Terraform init command. Terraform init command scans through all of the *.tf files in the present working directory and automatically downloads all the providers needed for them.
5. Add Task – Terraform Plan
- Add Terraform CLI tasks like the initial task, but you should select the command “Plan” for this one. You should fix the Configuration Directory like the previous task.
- Set the “Environment Azure Subscription” that should guide your Azure service connection configured before, you should establish the connection if required.
- The terraform plan command is used to build an execution plan. Terraform decides what actions are necessary to achieve the desired requirement stipulated in the configuration files.

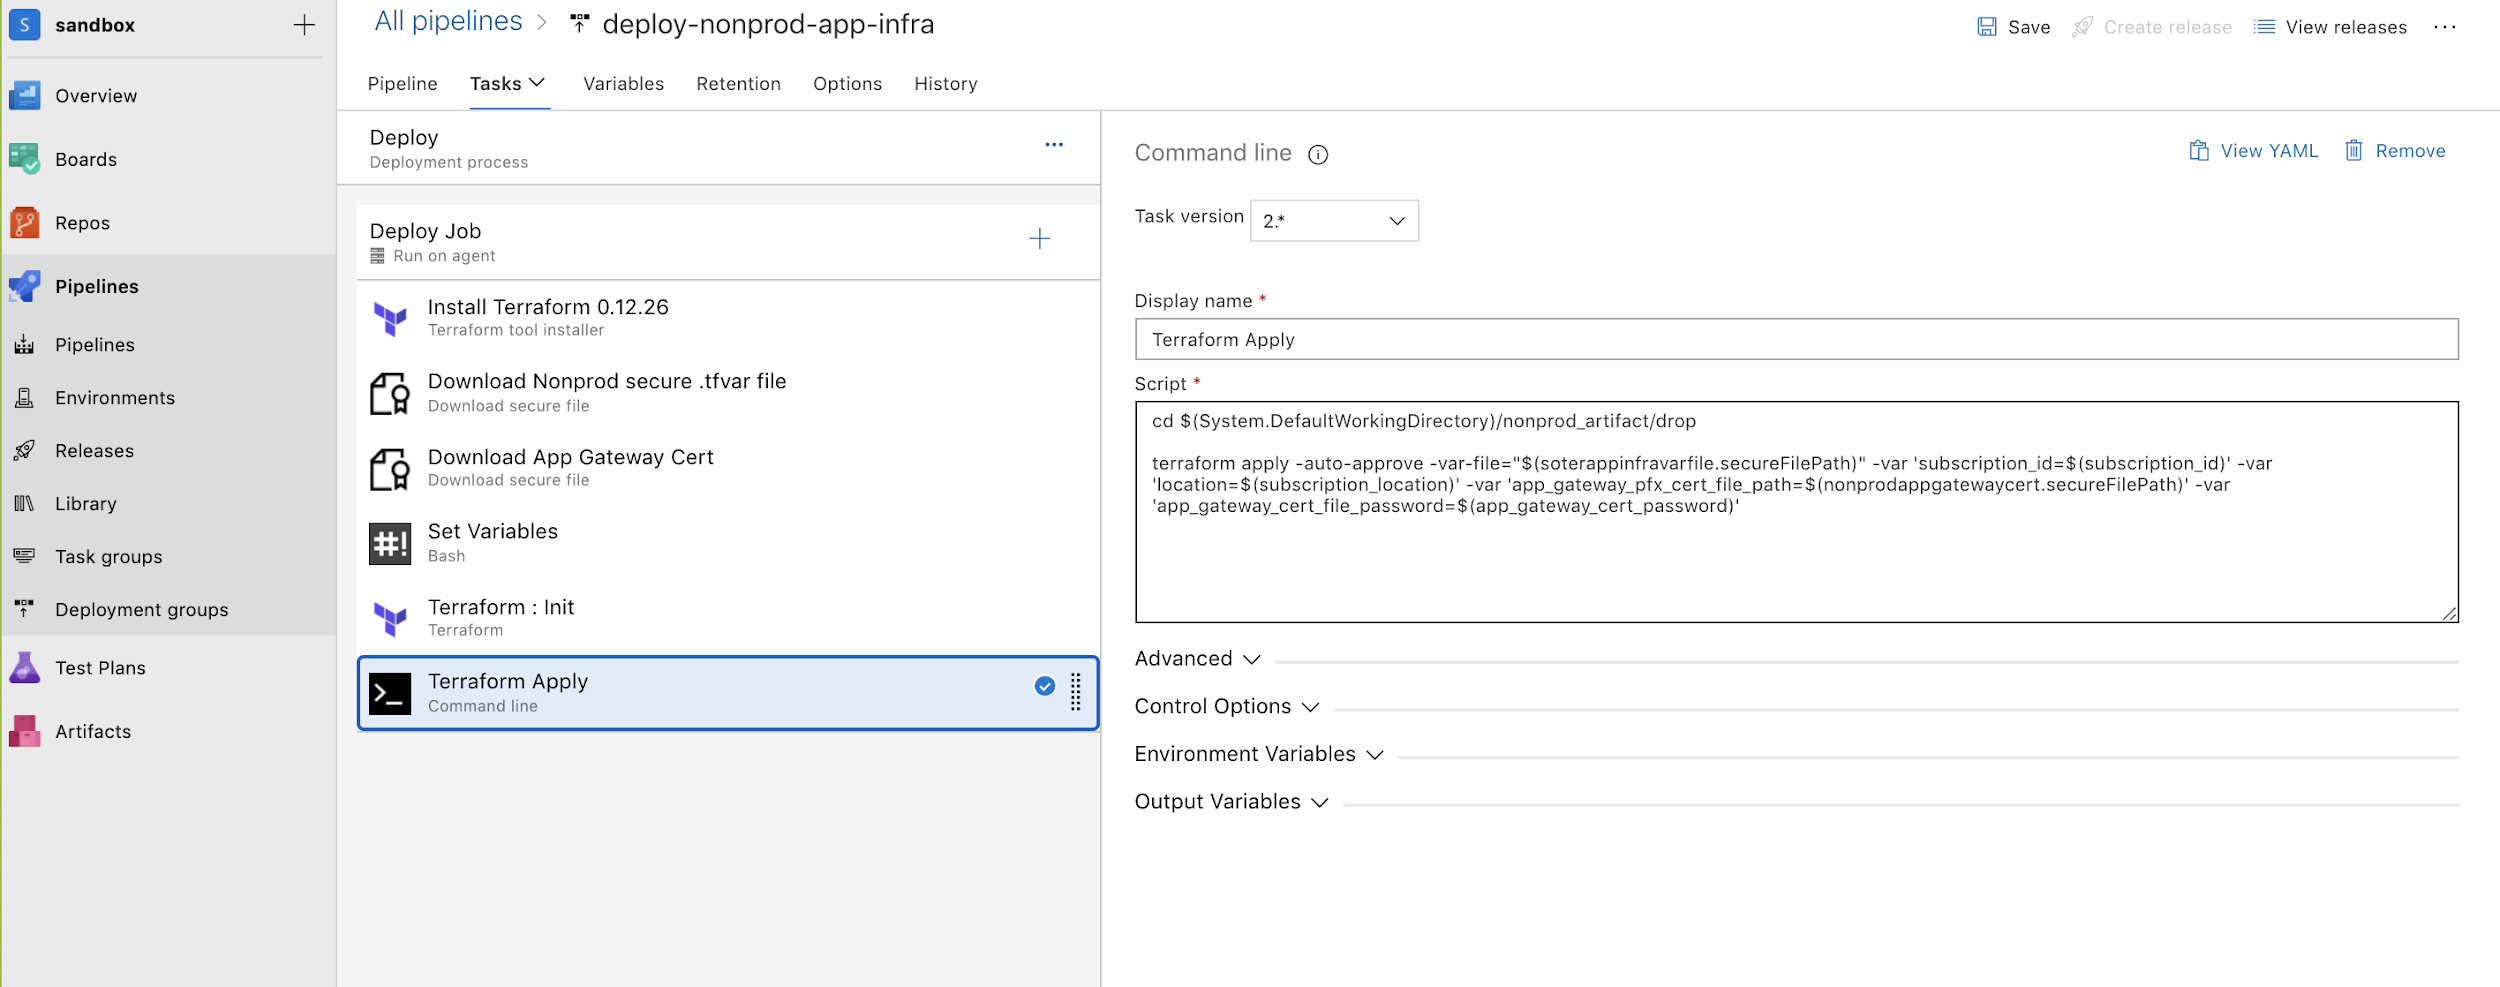
6. Add Task – Terraform Apply
- Add Terraform CLI tasks like prior tasks, but for this one, you should choose the command “Apply.” You should set the Configuration Directory like the former task. Also, set the “Environment Azure Subscription” that should steer to your Azure service connection configured previously.
- This job will run the terraform- apply the command to extend the resources to Azure Cloud.
7. Save your Pipeline
- Once the pipeline configuration is created, set a Name on it, and save modifications.
8. Launch your Pipeline
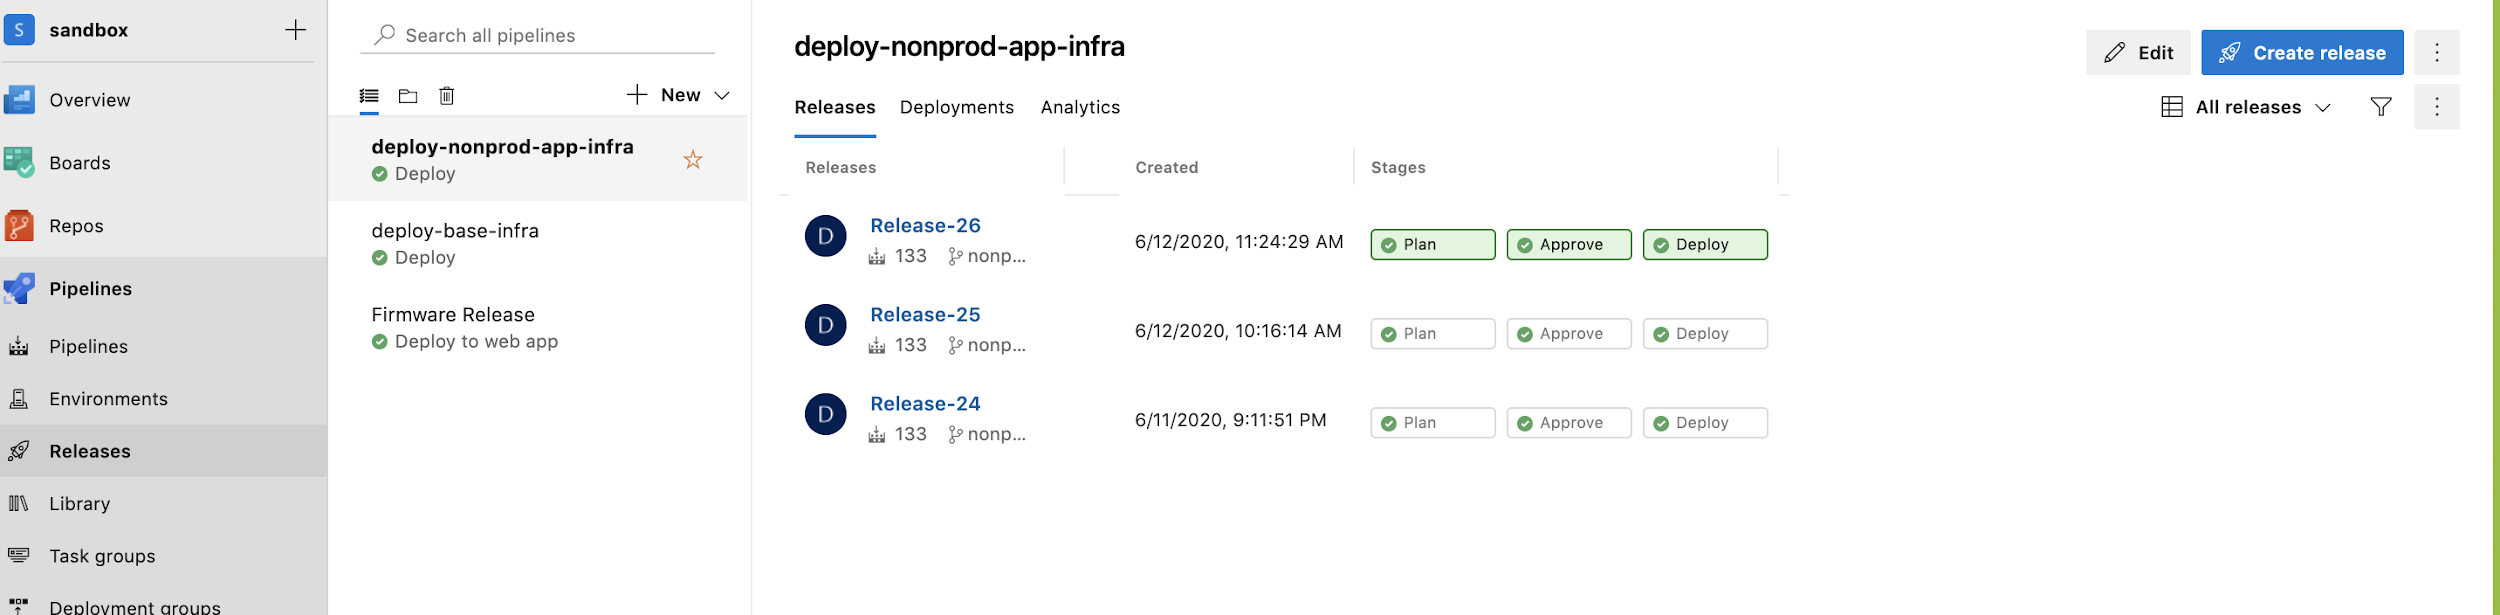
- Here we go, the Pipeline is now available. Now we can Create a Release; this operation will start the execution of the Pipeline and its jobs.
- When the Pipeline’s execution is finished, you will be able to see the new infrastructure devised in Azure.

Therefore we have created an Azure App Service that is able to host a microservice. To deploy an App Service with higher compute capacity or different Runtime, you can effortlessly do that by changing your infrastructure outlines on the .tf file.